
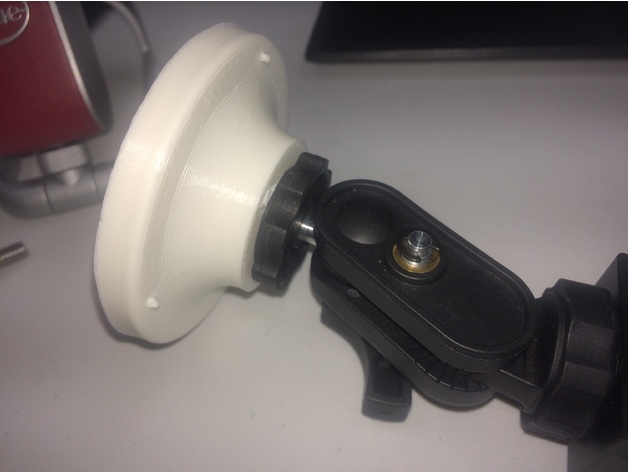
3 Inch AT Switch Camera Mount
This is an inexpensive 3d printed mounting adapter to attach larger commercial assistive switches to camera-type mounts
 Mechanics
 3D Printing
 1
1 14
14 2
2 557
557Device Information
Overview
This is an inexpensive 3d printed mounting adapter to attach larger commercial assistive switches to camera-type mounts designed by ATMakers. This adapter should work with the following AbleNet switches:
- Jelly Bean Twist
- LITTLEmack
- LITTLE Step-by-Step
- LITTLE Step-by-Step with Levels
- LITTLE Step-by-Step Choice with Levels
- LITTLE Step-by-Step GamePlay
- iTalk 2
- iTalk 2 with Levels
This mounting adapter also works with the Interact Switch from our assistive devices library.
How To Use
The switch is connected to the mounting adapter using three screws. The mounting adapter can then be attached to a tripod or a mounting arm with a camera connection (i.e., 1/4″-20 UNC) to provide convenient switch placement.
Disability Type Description
This device is designed for any user that needs to use an assistive switch.
Estimated Cost (CAD)
Maker Information
Skills Description
The only skills involved are beginner level 3D printing and assembly.
Print Time (hrs)
2
Assembly Time (hrs)
0.17
Tools Needed
Common Hand Tools;3D Printer
Build Instructions
A comprehensive set of instructions for creating this style of switch mounting adapter is available at the following link: http://atmakers.org/2017/02/at-switch-adapters/
Print Settings:
- 0.2mm layer height
- 15% infill
- No Supports
Clean out any support material from the center section.
To install the tee nut, line up the barbs of the tee nut with the slots on the mount adapter. Put the washer on the 1/4″-20 UNC bolt, and thread it through the adapter and into the tee nut. Tighten the bolt until the tee is flush with the bottom of the adapter. You can then unscrew and remove the bolt and washer.
Project Link
Please login or register to agree to the MMC Terms of Use to access the Project Link
License
Attribution
AT Makers
Reviews

There are no reviews for this device