Connect Board
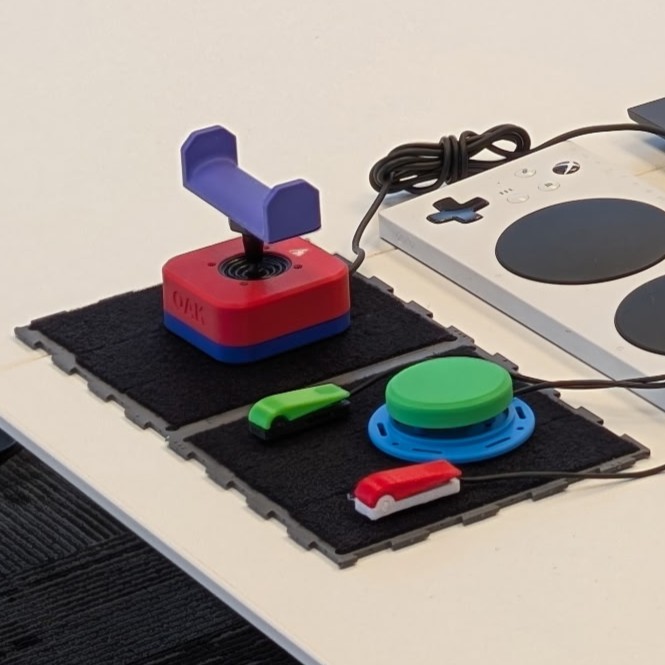
If you need a way to keep your assistive devices precisely positioned, the Connect Board is a mounting solution that uses hook and loop fasteners on an expandable, packable board that won’t slide around while in use. It is compatible with Velcro products.
 3D Printing
 4
4 28
28 0
0 411
411Device Information
Overview
The Connect Board is a low-profile hook and loop surface for mounting and positioning assistive technology (AT). It has a non-slip bottom, is compatible with VELCRO hook and loop fasteners, and folds up for packability. The Connect Board is commonly used for adaptive gaming, to position assistive switches and adaptive joysticks, but can be used for any AT you want to position with hook and loop. The Connect Board is intended to be used on another flat surface such as a table or tray, and is not a self supporting lap tray or table.
The Connect Board is available in two variants: The Connect Board Solo and The Connect Board Multi
- Connect Board Solo – two half boards with smooth finished edges connected with a foldable hinge. The overall size is 18 cm by 33 cm.
- Connect Board Multi – two half boards with interlocking edges connected with a foldable hinge. The overall size is 18 cm by 34 cm. Multiple boards and edge pieces can be tiled together using the interlocking edges to form one larger mounting surface.
How To Use
The Connect Board is used to secure devices with hook and loop fasteners, so the first step is to make sure all devices you would like to put on the Connect Board have the hook (rough) side of the hook and loop fastener on the bottom surface. Then, follow the following steps:
1. Unfold the Connect Board and place it with the nonslip material facing down and the hook and loop side facing up.
2. If you are using multiple Connect Board Multi units, connect them together in whichever orientation you would like.
3. Place your AT on your Connect Board(s), and reposition as needed.
4. (Optional) for a more secure connection between Connect Boards, use a piece of filament to attach the boards together, pushing it into the hole where the two boards meet.
5. (Optional) If desired, you can then place edge pieces around your Connect Board Multi setup, for a more finished look. Match the dots on the edges to the dots on the board. You can also secure these edge pieces with a piece of filament for a more secure connection, as above.
6. (Optional) If you would like to keep your Connect Board in position more securely, you can use the screw holes to fasten it to a table, board, or other surface below. The holes will fit size #4 or M3 screws.
Disability Type Description
The Connect Board may be useful to anyone using assistive technology on a flat surface, particularly if using multiple devices, and may include individuals with limited dexterity or limited fine motor skills.
Estimated Cost (CAD)
Maker Information
Skills Description
This device involves beginner level 3D printing and assembly.
Print Time (hrs)
4.5
Assembly Time (hrs)
0.5
Tools Needed
3D Printer
Build Instructions
The Connect Board consists of a 3D printed board, pieces of 3D printing filament, adhesive hook and loop strips, and adhesive nonslip strips. To build the Connect Board you need to be able to 3D print the board, perform simple assembly with pieces of filament, cut the adhesive strips to length, and apply them to the board.
For detailed step-by-step build instructions, please refer to the Maker Guide.
Project Link
Please login or register to agree to the MMC Terms of Use to access the Project Link
License
Attribution
The Connect Board was designed and documented by the Neil Squire Society.
Contributors:
· Josie Versloot. Design, documentation. Neil Squire Society / Makers Making Change.
· Jake McIvor. Neil Squire Society / Makers Making Change.
· Tyler Fentie. Neil Squire Society / Makers Making Change.
Reviews

There are no reviews for this device