Open Playback Recorder
Enables individuals with speech disorders or non-verbal challenges to express themselves by using an assistive switch to play pre-recorded messages.
 Electronics
 Custom PCB
 3D Printing
 Software
 3
3 62
62 1
1 1.8k
1.8kDevice Information
Overview
The Open Playback Recorder is designed for individuals facing communication challenges, such as those with speech disorders, non-verbal individuals, or people with disabilities that impact their ability to communicate verbally. This device allows users to record messages or phrases, which can then be played back when needed by activating an assistive switch. This functionality empowers individuals to express themselves, share information, or engage in conversations, thereby enhancing their overall communication experience and promoting inclusivity in various social settings.
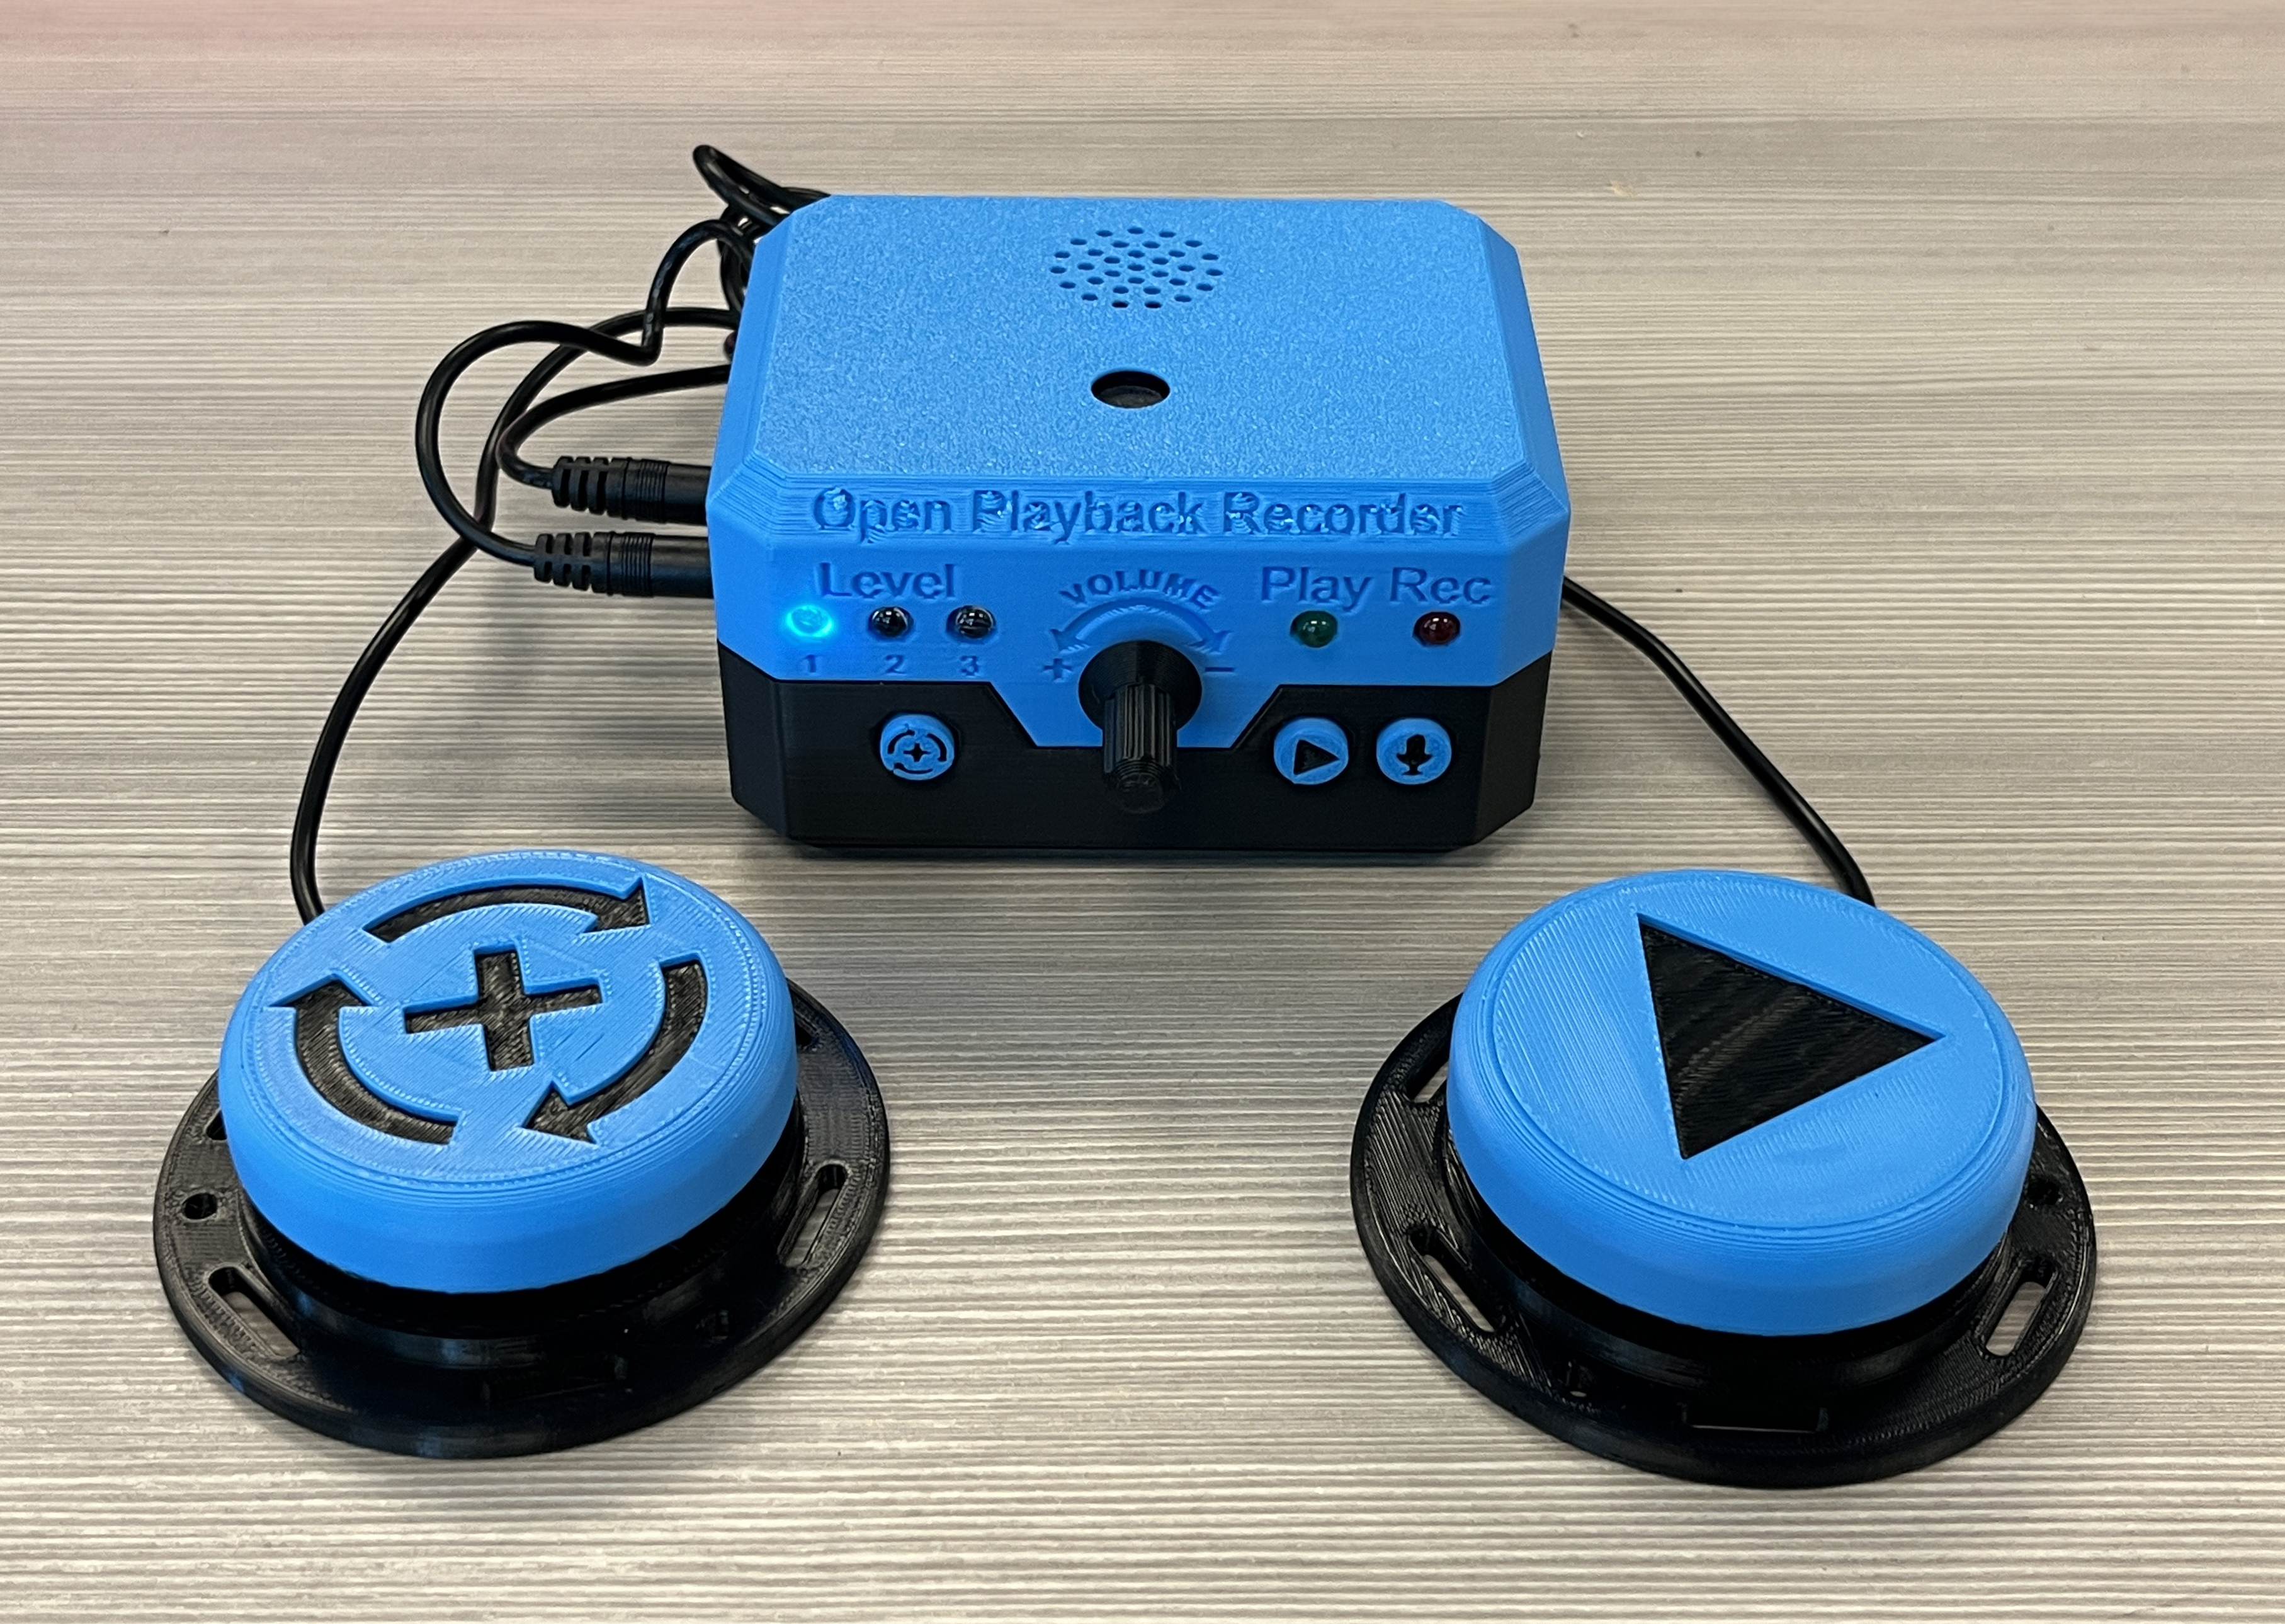
This device has similar functionality to AbleNet’s Big Mack or Step by Step. The Open Playback Recorder has a microphone for recording messages or sounds and a speaker for playing them back. The device can record a single message or a sequence of messages that will be played back in order. The device has three levels so that three sets of messages can be stored and played for different situations.
The device has two 3.5 mm ports for assistive switches. One switch input is used for play and an optional second switch input can be used to cycle between the levels. There are built-in buttons on the device that enable a secondary user or aid to also play, cycle the level, and activate recording. There is also a volume control and lights that indicate when the device is playing, recording, and which level is active.
How To Use
Setup
Connect two assistive switches, one to the jack labeled PLAY, and a second optional one to the jack labeled LEVEL. The device can also optionally be mounted to a mounting arm with a 1/4-20 thread using the T-Nut in the base.
Power On
To power on the device, flip the switch on the side of the device from OFF to ON.
Message Recording
To record one or more messages, the device needs to be in Record Mode. The device will record messages to the currently selected level.
Step 1. To engage “Record Mode” hold down the REC button for 2 seconds. When Record Mode is engaged, the REC LED will turn red and remain solid.
Note: When Record Mode is engaged, all previous messages on that level will be erased.
Step 2. To start message recording, press and hold the PLAY button or assistive switch connected to the play jack. The REC LED will flash red. Record the message into the microphone and release the button to end and save the message. The RED LED will once again turn red and remain solid.
Step 3. To record additional messages, repeat Step 2.
Note: These messages will later by played back in the same order they were recorded.
Step 4. When the desired messages have been recorded, press the REC button to exit Record Mode. The red REC LED will turn off.
Message Playback
To play back a message, press an assistive switch connected to the play jack. This will play a message from the current recording level. The play button on the device itself will also allow a secondary user to play a message. Continuing to press the button will cycle through all the messages on that level.
To change the message level, press an assistive switch connected to the level jack. The level shift button on the device will also allow a secondary user to change the message level. The current level will be indicated by the three blue LEDs on the left side of the device.
Disability Type Description
This device is intended for people for individuals facing communication challenges, such as those with speech disorders, non-verbal individuals, or people with disabilities that impact their ability to communicate verbally.
Estimated Cost (CAD)
Maker Information
Skills Description
This build involves 3D printing, soldering and assembling electronics onto a PCB, and flashing firmware.
Print Time (hrs)
8
Assembly Time (hrs)
1
Tools Needed
Common Hand Tools;3D Printer;Soldering Iron
Build Instructions
This device consists of off-the-shelf hardware and electronic components two custom PCBs, and 3D printed components. The main work on this build involves soldering together two circuits on PCBs, one for each half of the enclosure.
Project Link
Please login or register to agree to the MMC Terms of Use to access the Project Link
License
Attribution
Designed by Neil Squire / Makers Making Change.
Reviews

There are no reviews for this device