How to Customize a Switch Button
Adding texture, symbols, and words to a switch button is a great way for users to customize their switch setup.
Follow these tutorials to customize your MMC60 Switch or Interact Switch buttons using 3 popular programs.
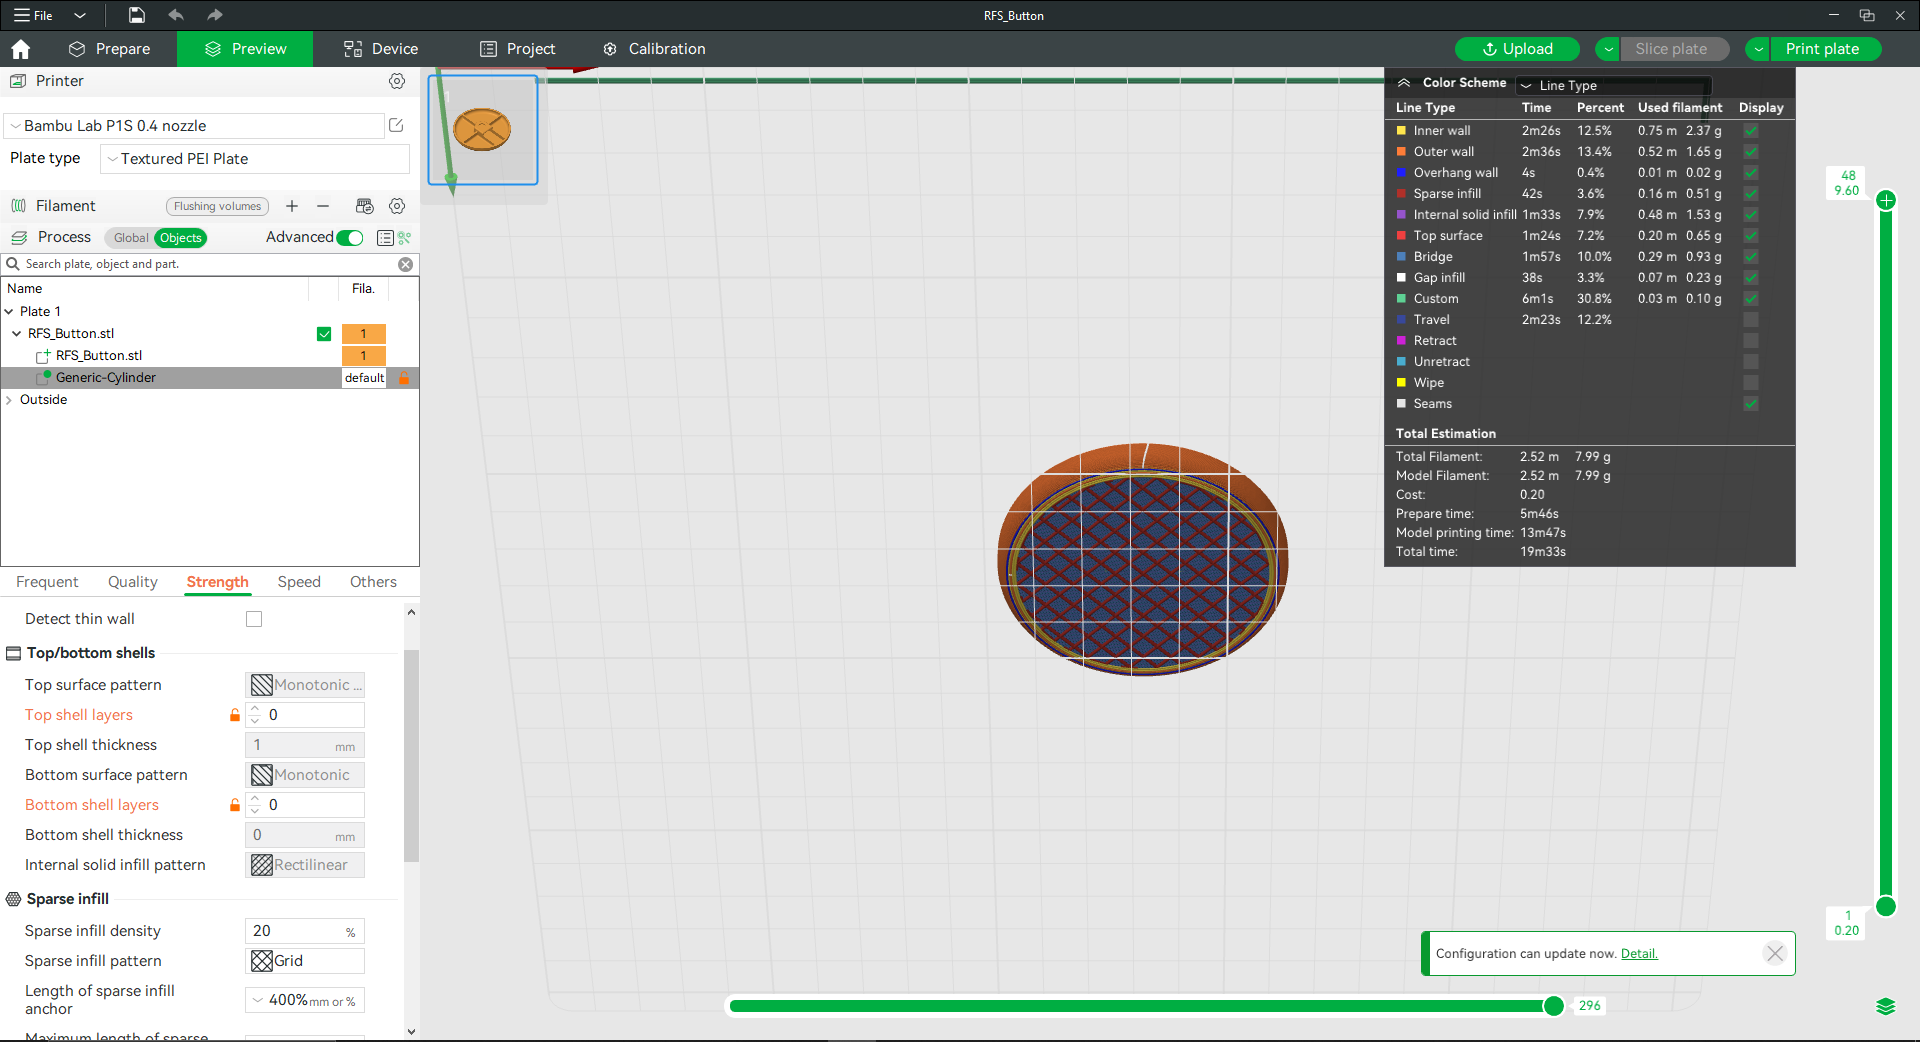
Tutorial #1: Adding Text and Symbols Using TinkerCAD
- Create an account on TinkerCAD.
- Import the STL into your account.
- Select Basic Shapes > Text and Numbers
- Drag and drop the text. Note: depending on your print settings and 3D printer, thinner text strokes may print better than wider ones.
- Modify your desired text > Font style > Height: 0.8 mm.
- Pan to the bottom view using the orientation cube on the top left > Select the text > Resize to the desired dimensions using the white squares.
- Select both the text and the button > Click on the Align button > Click on the two middle circles to centre align.
- Select the text > Hole
- Select the text and button > Group. This will create an emboss of your text into the button.
- Export > Save as STL.
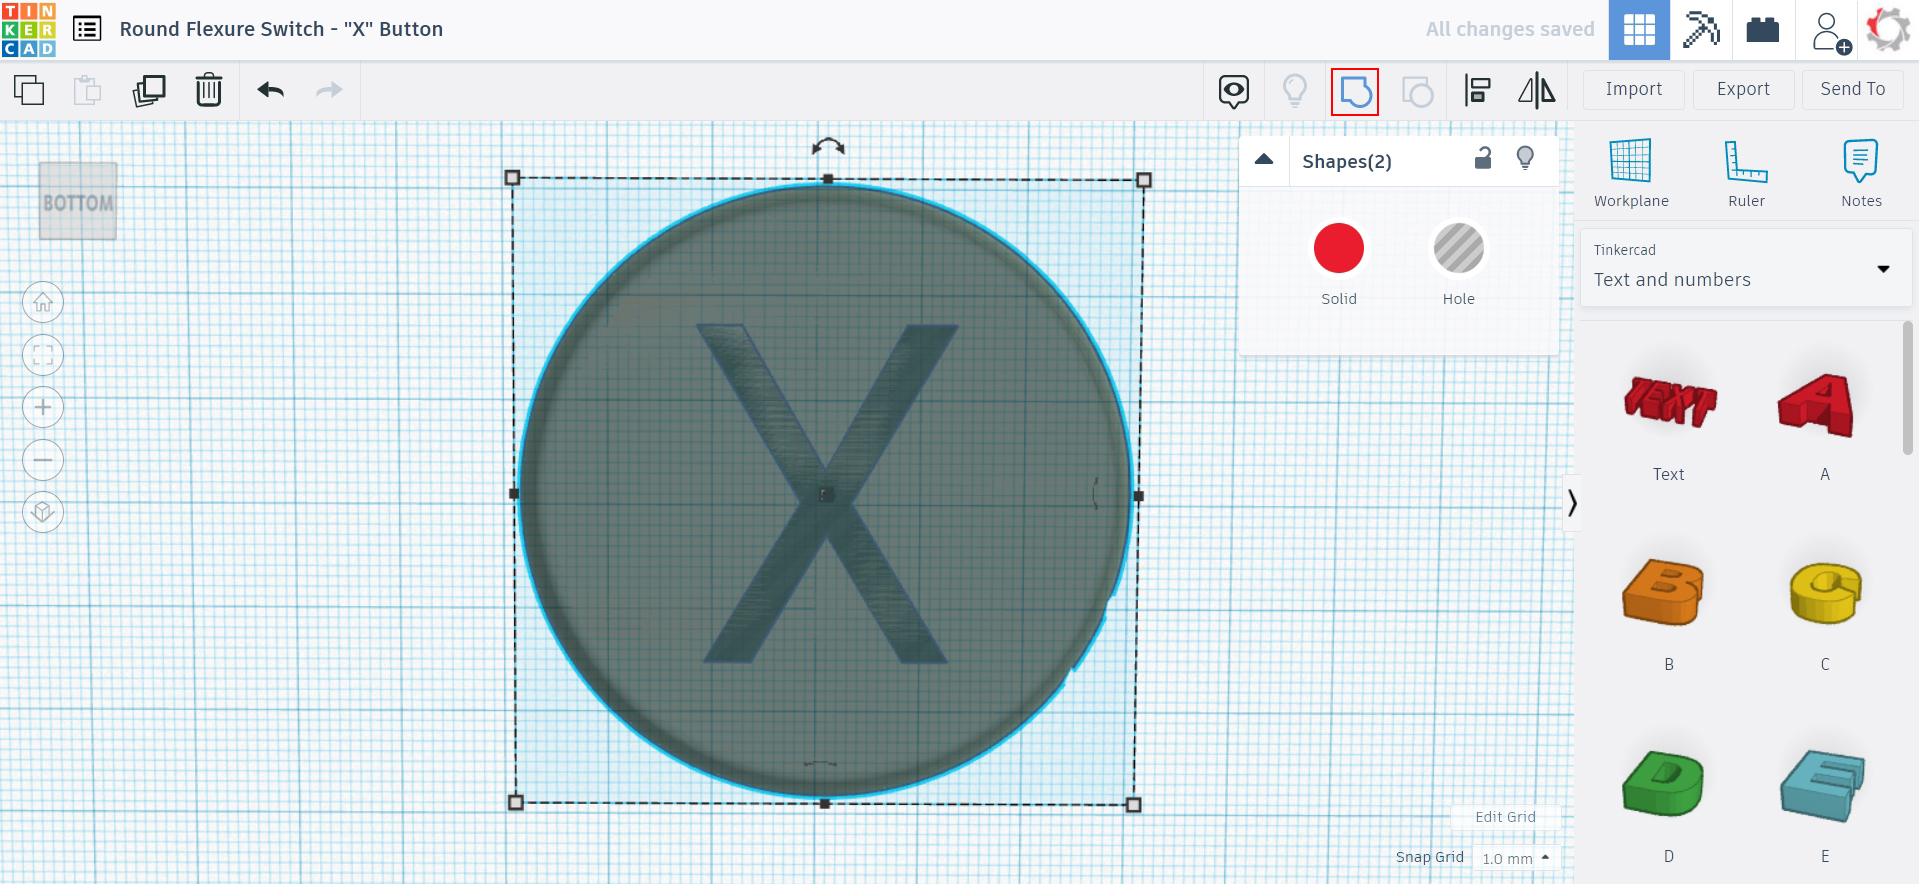
Tutorial #2: Adding Texture Using PrusaSlicer
- Download the latest PrusaSlicer.
- Import the button STL.
- Switch to Advanced print settings and set Print Settings: 0.2mm and Infill: 20%
- Right click on the imported STL and select Add Modifier: Cylinder.
- Unlock uniform scaling and set X, Y, Z size to 60, 60, 0.8 mm.
- Set X and Y position to 0, 0 and click on drop to bed icon.
- Right click on cylindrical modifier and click Layers and Perimeters.
- Set top and bottom layers to 0.
- Under the Print Settings tab > Infill > Play around with Fill Density and Fill Pattern to create different textures.
- To preview the design go back to Plater tab > Preview. When you find a pattern you like, Export G-code.
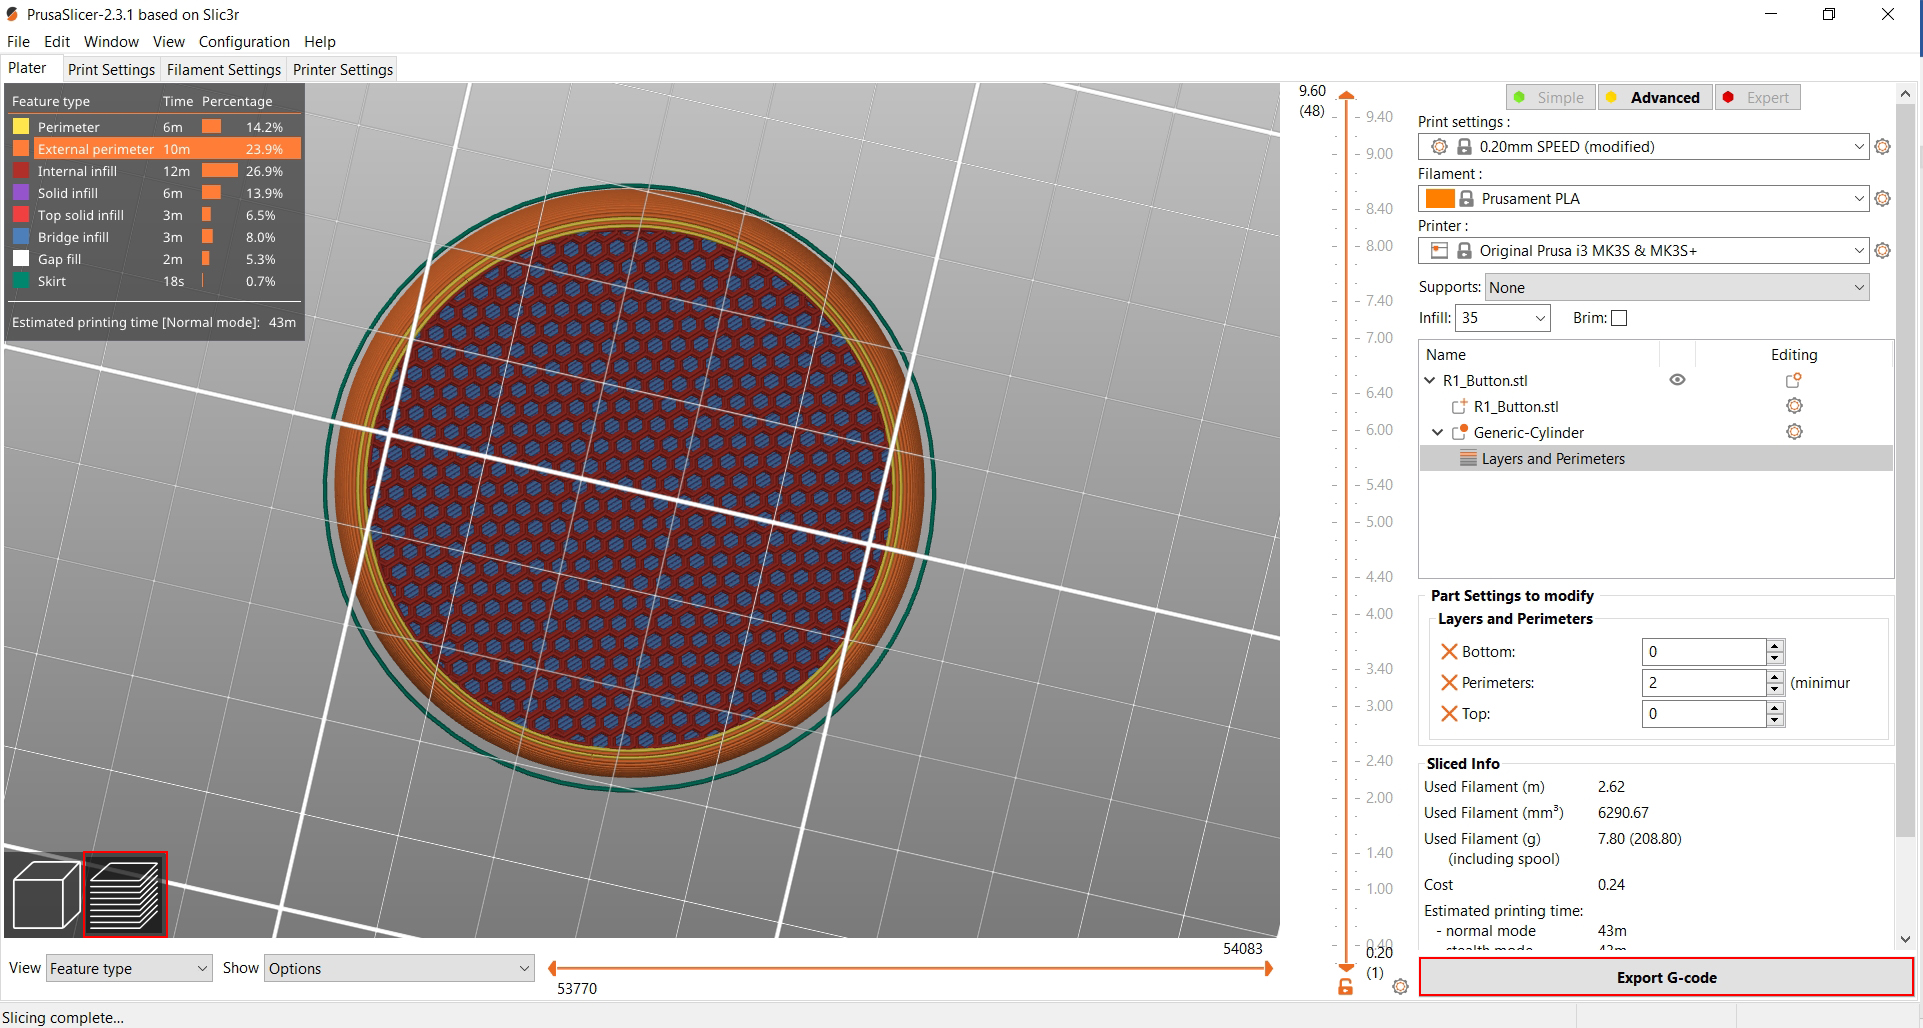
Tutorial #3: Adding Texture Using Ultimaker Cura Slicer
- Download the latest Ultimaker Cura Slicer.
- Import the button STL
- Select both imported STL selected > Right Click > Centre Selected.
- In the print settings set Profile: 0.2mm, Top/Bottom Thickness: 0.4 mm, Top Layers: 2, Bottom Layers: 0, and Infill Density: 20%
- With only the RFS_Cylinder.stl selected, click on Per Model Settings > Modify Settings for Overlaps. Select Cutting Mesh and Select Settings.
- Check Infill Density and Infill Pattern > Close settings window.
- Play around with the texture by changing Infill Density and Pattern.
- Preview the texture by clicking Slice.
- Preview to see design > Save To Disk.
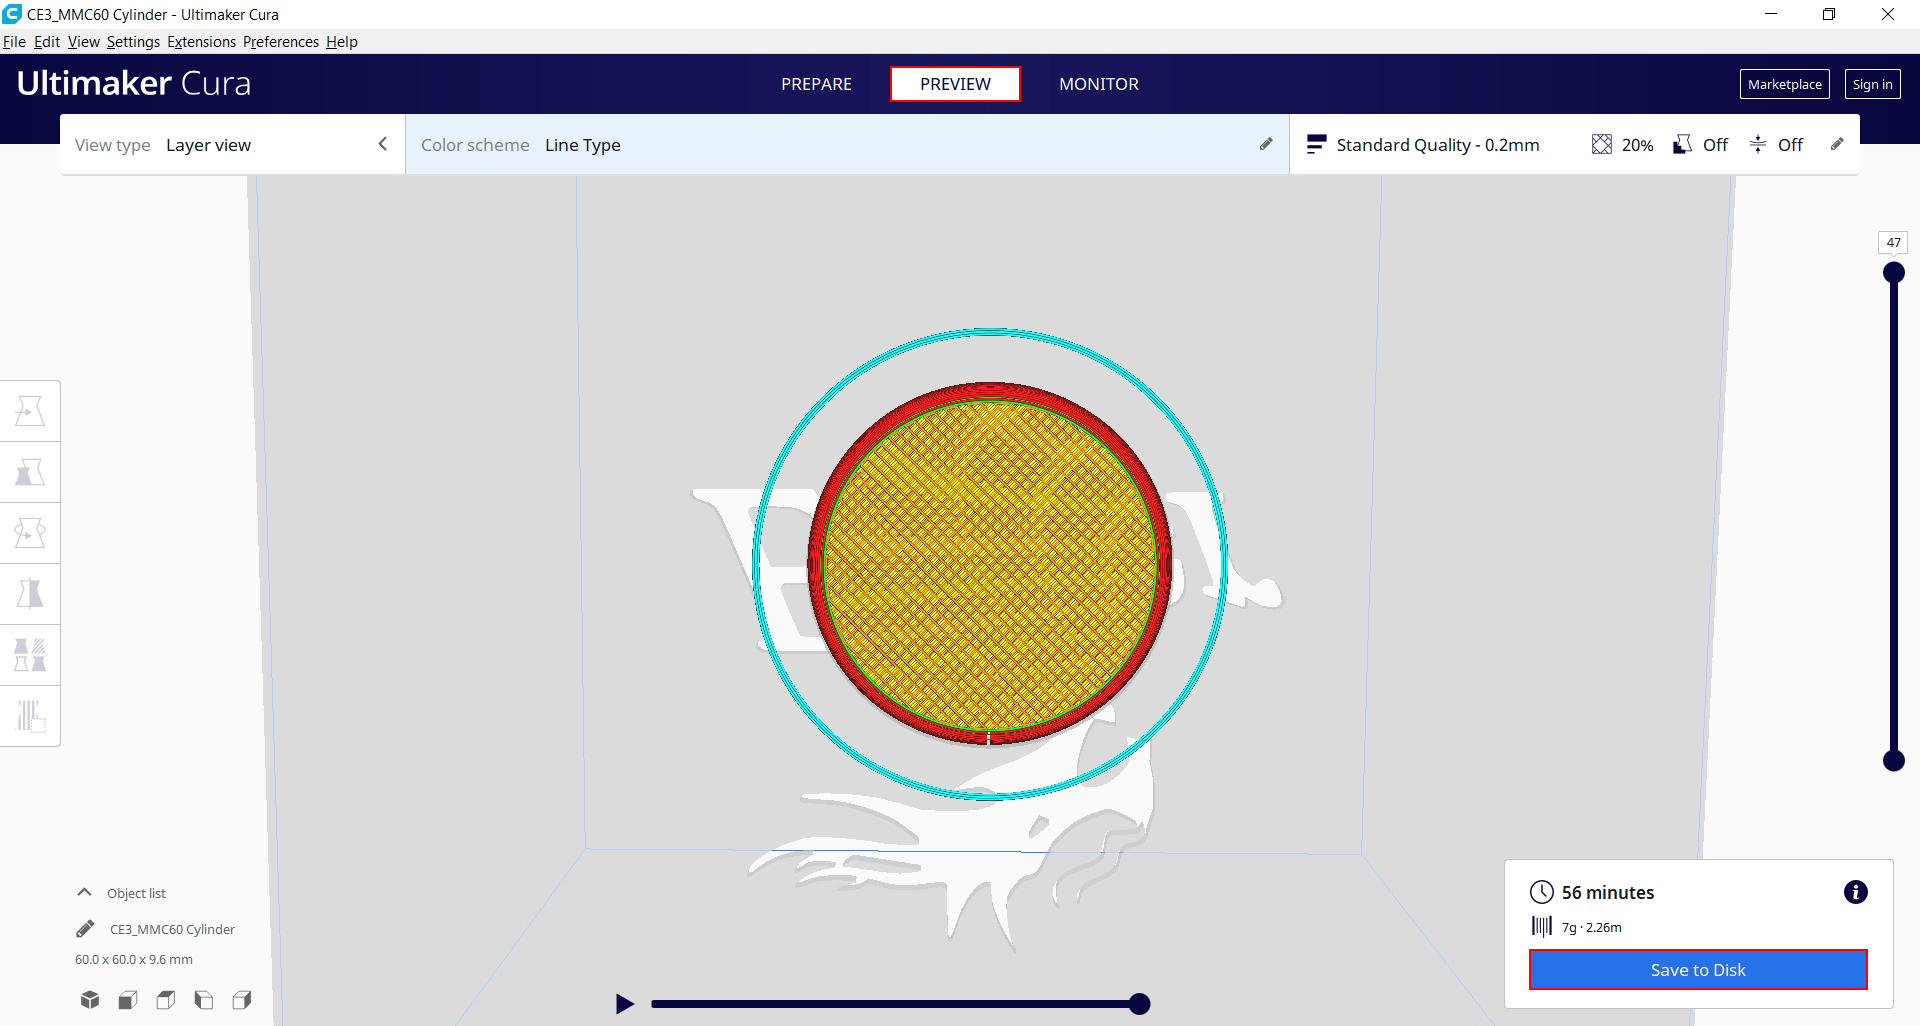
Tutorial #4: Adding Texture Using Bambu Studio Slicer
- Download the latest Bambu Studio Slicer.
- Import the button cap STL.
- Switch to Advanced print settings and set Print Settings: 0.2mm and Infill: 20%
- Right click on the imported STL and select Add Modifier: Cylinder.
- Select the cylinder. Unlock uniform scaling and set X, Y, Z size to 60, 60, 0.8 mm.
- Select the imported button STL and click Assemble. Select the top of the cylinder and top surface of the button cap, then select Center Coincidence.
- Select the cylinder and set the Z position to 0.4.
- With the cylinder still selected, go to Strength in the panel on the left side of the screen.
- Set top and bottom shell thickness to 0.
- Under the Sparse Infill section, play around with Sparse Infill Density and Sparse Infill Pattern to create different textures.
- To preview the design, select Slice Plate. Under the Preview tab you can inspect each layer to look at the pattern that will appear on the top. To change the pattern, you can go back to the Prepare tab.
- When you are happy with the pattern, select Print Plate to send the file to the printer (only when this is an option), or select the drop down arrow beside Print Plate and select Export plate sliced file to export and save the file.